Posts

Showing posts from December, 2021

Sun Tracker Solar Panel - Circuit Diagram | Dual Axis Without Arduino | Harish Projects

Image
 Circuit Components List  1. TDA2822 IC 2x 2. 10k ohm Resistor 4x 3. 5mm LDR 4x 4. N20 Gear Motor 2x 5. N20 Wheel 6. Solar Panel  7. Zero PCB 8. Sunboard  9. 3.7v Small Battery  10. Charging Module 11. Tip Top Button Ordre all components from Here  Click here 👉  https://harishprojects.com/   …….. Circuit Diagram……….. ……….Watch full Detailed video………

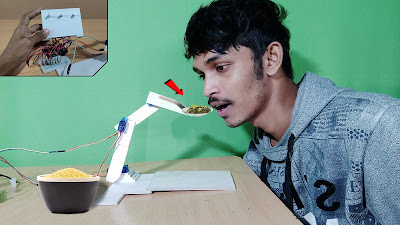
Automatic food feeder Robot for Handicapped Person's Best Project / Harish Projects

Image
                                                          Click Here to watch full video                                              https://www.youtube.com/watch?v=QaJKs9xJkSk                         ...............................................Arduino Code................................................ //Code written by Ryan Chan; it is pretty inefficient, but gets the job done, I challenge you to make it more efficient! //*IMPORTANT CHANGES IN VERSION 2: LEDs 4 and 5 have been moved to pins 7 and 8 respectively; Buttons 1 and 2 have been moved to pins 12 and 13 respectively. This is to make wiring easier. #include <Servo.h> Servo servo1; //Servos Servo servo2; Servo servo3; const int LED1 = 2; //LEDs const int LED2 = 3; const int LED3 = 4; const int LED4 = 7; const int LED5 = 8; const int button1 = 12; //Buttons const int button2 = 13; int button1Presses = 0; //Button values boolean button2Pressed = false; const int pot1 = A0; //Potentimeters const int pot2 = A1;  const in

Voice Control Humanoid Robot - Best Project For Collage students / amazing science project

Image
                          Click Here Full Making Video Link -   https://youtu.be/wHjmwelL95c ......................Diagram........................ .............................Arduino Code.......................... #include <SoftwareSerial.h> SoftwareSerial BT(0, 1); //TX, RX respetively String readvoice; void setup() {  BT.begin(9600);  Serial.begin(9600);   pinMode(4, OUTPUT);   pinMode(3, OUTPUT);   pinMode(5, OUTPUT);   pinMode(6, OUTPUT); } //-----------------------------------------------------------------------//  void loop() {   while (BT.available()){  //Check if there is an available byte to read   delay(10); //Delay added to make thing stable   char c = BT.read(); //Conduct a serial read   readvoice += c; //build the string- "forward", "reverse", "left" and "right"   }    if (readvoice.length() > 0) {     Serial.println(readvoice);   if(readvoice == "*forward#")   {     digitalWrite(3, HIGH);     digitalWrite (4, HIG

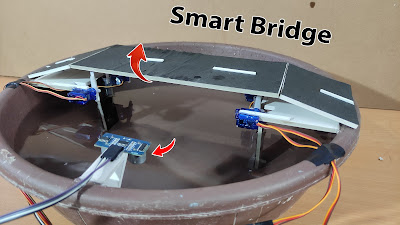
Smart Bridge - According to water level Best science Project.

Image
  .......................Diagram...................... ...................Arduino Code..................... //YouTube Harish Projects  #include <Servo.h> // constants won't change const int TRIG_PIN  = 6;  // Arduino pin connected to Ultrasonic Sensor's TRIG pin const int ECHO_PIN  = 7;  // Arduino pin connected to Ultrasonic Sensor's ECHO pin const int SERVO_PIN = 9; // Arduino pin connected to Servo Motor's pin const int DISTANCE_THRESHOLD = 4; // centimeters Servo servo; // create servo object to control a servo // variables will change: float duration_us, distance_cm; void setup() {   Serial.begin (9600);       // initialize serial port   pinMode(TRIG_PIN, OUTPUT); // set arduino pin to output mode   pinMode(ECHO_PIN, INPUT);  // set arduino pin to input mode   servo.attach(SERVO_PIN);   // attaches the servo on pin 9 to the servo object   servo.write(0); } void loop() {   // generate 10-microsecond pulse to TRIG pin   digitalWrite(TRIG_PIN, HIGH);   delayMicr